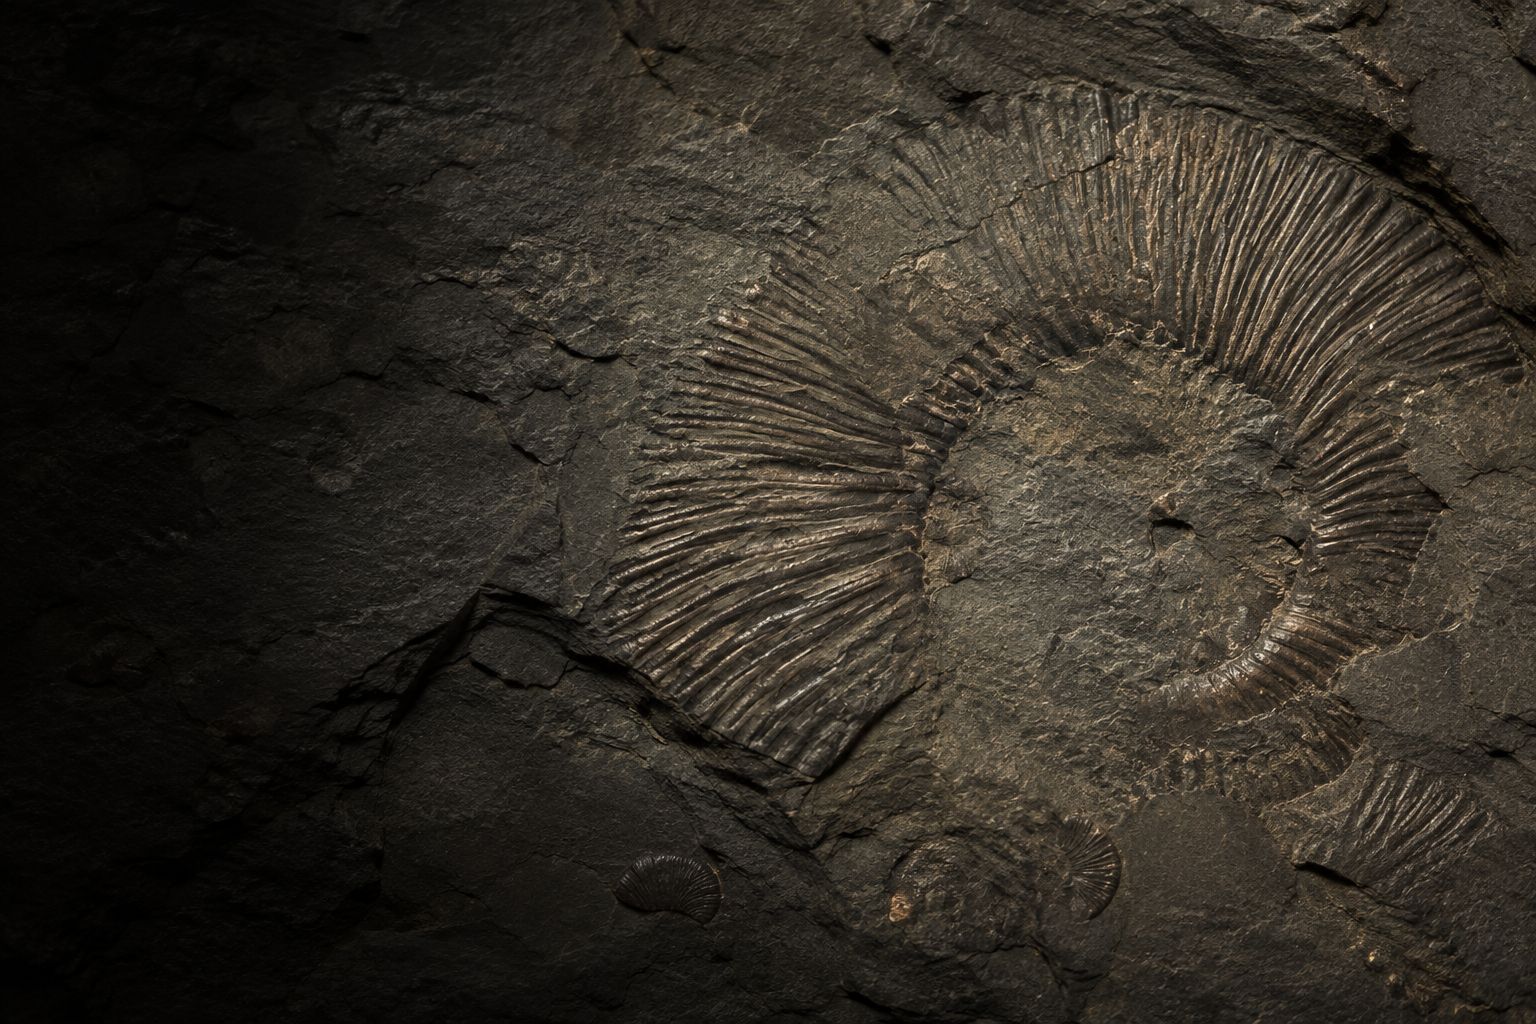
Illustrated study of an incomplete ribbed ammonite emerging from dark sedimentary rock
Dirt Quest / Field guides / No. 02

HALE CREEK · WEST HARRISON

Learn to see
the fossil.

A curve. A few ribs. A shell edge hiding in ordinary grey rock. Train your eyes for the small clues that make a second trip different.

Start with three shapes

AI-generated specimen illustration.
Not a photograph of a Hale Creek find.

FIELD LESSON / 01

Three shapes to carry in your head.

The first find is often a fragment. Study the repeated structure, then look for a second clue. Tap a specimen to change the lesson.

ILLUSTRATION · exaggerated for recognition · no scale

COIL + REPEATED RIBS

Follow the curve.

Cadoceras reported locally

Look for a curved whorl crossed by repeated ribs. You may see only a ribbed crescent; the centre can be crushed or hidden. A complete coil is a bonus.

Check it: Trace several ribs. Do they repeat around a coherent curve? Change the light and inspect the rest of the rock before deciding.

Look-alike: A round stain or a single curved fracture is not enough to identify an ammonite.

Use these shapes to choose what deserves a closer look. They are not a species-identification test. Fossils may be a raised cast, a hollow impression or a subtle fragment almost the same colour as the rock. Source links open real reference specimens.
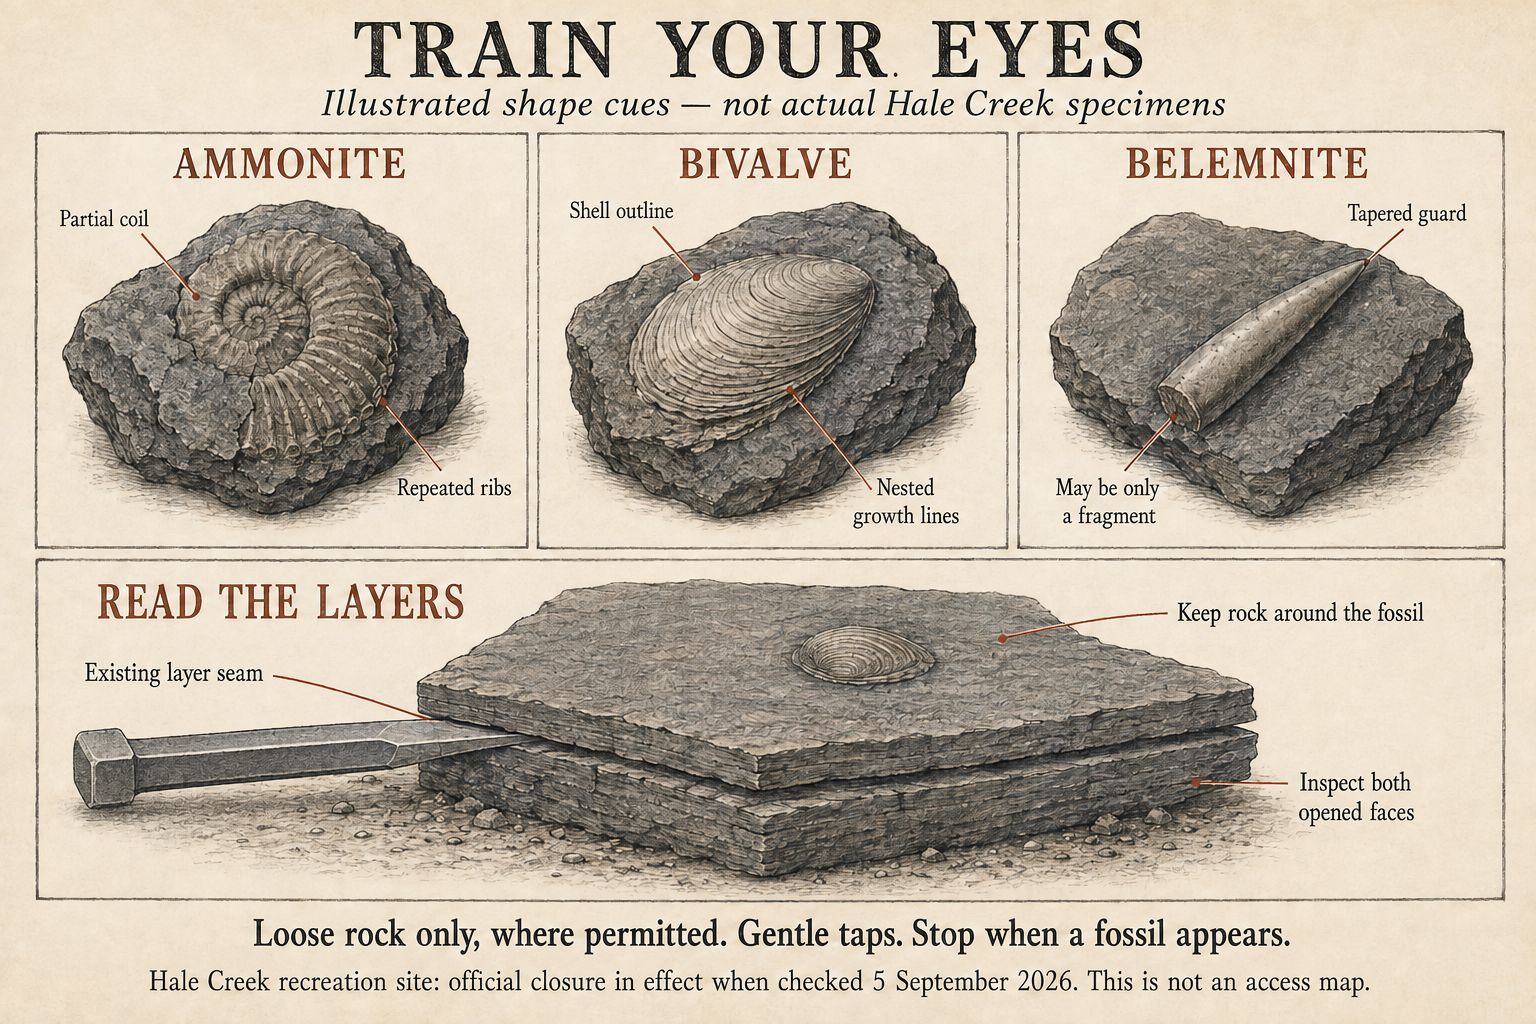
Teaching plate showing ammonite ribs, bivalve growth lines, a tapered belemnite guard and a chisel at a layer seam

Illustrations, not local specimen photographs. Wear impact-rated goggles and use a hammer rated to strike your masonry chisel. Work only on small loose material where collecting is permitted.

Ammonite · Follow the curve.

Cadoceras reported locally. Look for a curved whorl crossed by repeated ribs. You may see only a ribbed crescent; the centre can be crushed or hidden. A complete coil is a bonus.

Check it: Trace several ribs. Do they repeat around a coherent curve? Change the light and inspect the rest of the rock before deciding.

Look-alike: A round stain or a single curved fracture is not enough to identify an ammonite.

Bivalve · Find the shell edge.

Including Buchia in the wider Harrison succession. Look for a shell-shaped outline with nested growth lines. One valve may be strongly convex. Shell-rich rock can contain overlapping outlines and fragments.

Check it: Follow the growth lines toward an edge. Look for a shell boundary, relief or an impression that keeps the same organized shape.

Look-alike: Parallel sediment layers alone do not establish a shell. Not every local bivalve is Buchia.

Belemnite · Notice the taper.

The preserved guard of a squid-like animal. A smooth, elongated guard often tapers like a small bullet. A find may be only a broken section; colour varies and is not an identification test.

Check it: Inspect the side and broken end. Some guards show radiating calcite fibres or concentric growth structure. Record the shape before making a call.

Look-alike: A straight mineral vein or tapered chip can imitate the outline. Shape is a lead, not a verdict.
EYE EXERCISE / 01

Choose a small patch

Leave the hammer packed for ten minutes. Inspect a hand-sized area slowly, then move to the next. Give faint features time to resolve.

EYE EXERCISE / 02

Turn it, then tilt it

Check every face and edge of a small stable loose piece. Let light skim across the surface; a hand lens or a phone torch can reveal shallow relief.

EYE EXERCISE / 03

Ask for a second clue

A curve plus repeated ribs is stronger evidence than a curve alone. Look for an outline, a consistent pattern, or a matching impression.

EYE EXERCISE / 04

Learn the surrounding rock

After a convincing find, compare nearby loose pieces with the same grain and layering. Dark colour alone does not make a rock fossil-bearing.

FIELD LESSON / 02

Read the rock. Then read the ground.

Historical accounts place fossil exposures near Hale Creek on the west side of Harrison Lake. Dark, fine-grained sedimentary rock is a useful search image. The diagram points out surfaces worth understanding and hazards that can make them unsuitable to approach.

Local ammonites are reported from the Jurassic Mysterious Creek Formation. The wider Harrison succession includes different fossil-bearing beds; a shell-rich boulder does not establish the formation beneath your feet. Local field account

Field plate / Reading an exposureSchematic · not a map · no scale
Five features of a generic sedimentary roadside exposureTilted layered bedrock beside a road, with fallen rock and separate loose fragments. Numbered features correspond to the buttons below. The landscape is invented for teaching and does not show a permitted collecting stop.TILTED SEDIMENTARY LAYERSWORKING ROAD12345
Select a numbered feature below. Its placement does not establish safe access, parking or a collecting location.

Feature / 01

Inspect a broad face, then an edge.

Small loose pieces can expose layers and fossil impressions. Examine them only where access and collecting are permitted, on stable ground clear of traffic and falling material. A fragment drawn here is not a safe-stop recommendation.

  1. 1. Small loose fragments

    Inspect a broad face, then an edge. Small loose pieces can expose layers and fossil impressions. Examine them only where access and collecting are permitted, on stable ground clear of traffic and falling material. A fragment drawn here is not a safe-stop recommendation.

  2. 2. Weathered bedding

    Look along the layer, not just at its colour. Weathering can reveal a shell edge, repeated ribs or a hollow impression. Use exposed surfaces to learn the rock from an established lawful position. This label does not authorize approaching or breaking a rock face.

  3. 3. Shell-rich block

    Trace overlapping outlines. A large block may contain many shell fragments. Photograph visible patterns where you can do so without entering a hazard area. Leave the block whole; smashing it loses both specimens and geological context.

  4. 4. Face and fallen debris

    Fallen rock is evidence of movement. The base of a cut and its debris apron can lie in the path of more falling material. Do not climb the face, undercut it, or search beneath it. Trees and loose material above can extend the danger beyond what you can judge from a drawing.

  5. 5. Road and drainage

    A flat strip is not automatically a place to stop. Working forest roads need clear lanes, shoulders and drainage. A ditch may be unstable or channel water and debris. This schematic gives no parking location, safe distance or road-access assurance.

Promising texture

Fine-grained, layered rock with exposed broad faces. Inspect weathered surfaces and existing breaks before considering any splitting.

A fossil can be subtle

Look for relief, a hollow mould, a thin shell remnant or repeated ribs. The fossil and rock may have almost the same colour.

Keep the context intact

Photograph large shell-rich blocks. Leave them whole. Examine loose material only where access is permitted and stable ground is clear of traffic and falling material.

FIELD LESSON / 03

Open a layer. Save the fossil.

This method is for small, loose surface material where hand-tool collecting is allowed. It is not an invitation to excavate an outcrop. Select each step before taking the hammer out.

Work along an existing layer seam. Keep rock around the fossil. Inspect both opened faces.TEACHING DIAGRAM · SMALL LOOSE SLAB ONLY

Choose a small loose slab with visible layers and an existing seam. Think of the edge of a closed book: work along a page boundary. Layers can be tilted.

Set it securely on stable ground, clear of traffic and falling material. Keep fingers out of the split. Use impact-rated goggles and manufacturer-compatible rock tools.

Place a masonry chisel at the existing seam, away from any visible fossil. Use gentle, controlled taps. If it resists, shifts or crumbles, stop.

When a fossil appears, stop trimming. Keep a border of surrounding rock—the matrix—and inspect both halves. The fossil and its impression may be split between them.

Use a hammer rated to strike your masonry chisel. Do not use a woodworking chisel, damaged striking tool or an ordinary hammer without checking its instructions. Never strike the fossil or chip around its outline. Tool guidance

Method: Cincinnati Museum Center. Work slowly along natural breaks and leave detailed preparation until later.

FIELD LESSON / 04

Bring the story home with the rock.

A GOOD SECOND-TRIP TARGET

Three convincing features.
One rock type you recognize.
A record you can return to.

That is a useful afternoon even if every specimen stays in place.

The three-photo habit

  1. The whole rock and its setting, before moving it.
  2. A close-up with a ruler and light across the surface.
  3. An edge view showing the layers and thickness.

Record the date, exact location in your private field notes, and whether the piece was loose or attached. Keep a paper ID with any permitted specimen and its matching fragments. Cushion separately; brush only if the surface is sound.

Common fossils, small quantities

BC permits small quantities of common surface fossils using hand tools where land permissions allow. A common fossil must be abundant enough that a few specimens will not deplete the site. Collected Crown fossils remain Crown property. Parks, protected areas, closures and other land restrictions need their own authority.

Leave suspected bones, teeth, trackways or other significant finds in place. Photograph, record and report them to BC Fossil Management or a museum. Do not sell collected fossils or take them out of BC. Take less than you find and preserve the exposure for future study.

Read the collecting policy

THE EVIDENCE DRAWER

Read further. Check again.

Locality descriptions are historical evidence. Closure and road status can change. The hero and field card are AI-generated teaching illustrations; the numbered landscape is a schematic, not a surveyed location or a route.

  1. [01]

    Hale Creek recreation resource · REC0074

    Recreation Sites and Trails BC

    Status checked 5 September 2026: closed. The notice concerns the recreation site and nearby slope/tree hazards; separate roadcut access remains unverified.

  2. [02]

    Chilliwack district road notices

    Province of British Columbia

    Check current notices and local signs. This guide does not certify a road or pullout as open.

  3. [03]

    Harrison Lake fossil collecting

    Heidi C. Henderson · Fossil Huntress

    Firsthand historical locality account and real ammonite photographs. Used for local search cues, not current driving directions.

  4. [04]

    Fossil preservation, bivalves and belemnites

    British Geological Survey

    Survey references for casts, moulds, shell growth and guard structure. Individual group pages are linked in the specimen key.

  5. [05]

    Finding fossils

    Cincinnati Museum Center

    Work gradually along natural breaks; retain surrounding rock and leave detailed preparation until later.

  6. [06]

    Safety and product care

    Estwing

    Match striking tools to the job. Check tool condition and protect the eyes of the operator and bystanders.

  7. [07]

    Collection and use

    BC Fossil Management · updated 1 May 2026

    Small quantities of common surface fossils, hand tools and applicable land permissions; responsibilities for significant finds and collected material.

  8. [08]

    How to find fossils

    Natural History Museum

    Beginner observation and loose-material search methods. Beach-specific access advice does not apply to Harrison roads.

Return to the Dirt Quest field guide